How to disable UAC (User Account Control) in Windows
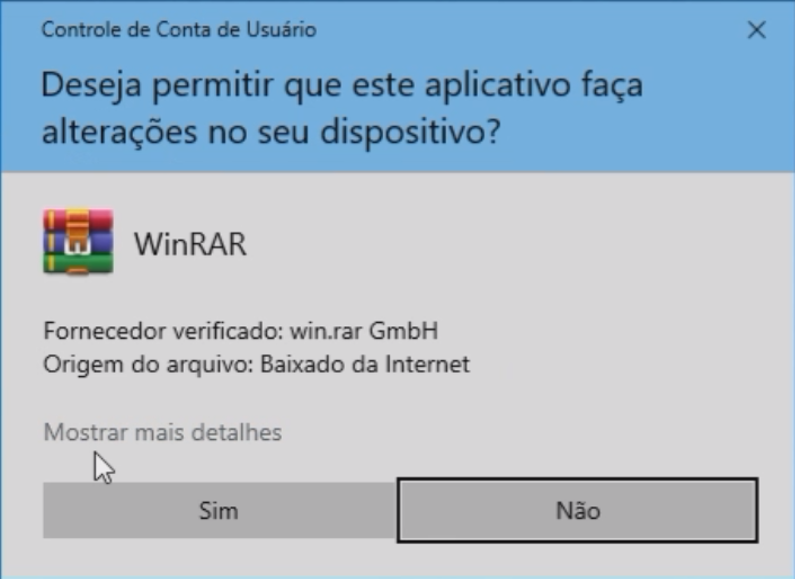
Does this message appear every time you open or install a program? See how to deactivate;

Learn how to disable UAC control. User Account Control (UAC) is a crucial feature in the Windows operating system, designed to enhance the security of your computer. It requests additional permissions before applications or system changes can be made, helping to prevent malicious software from making unwanted changes to your system.
However, there are situations where disabling UAC may be necessary to improve the efficiency of certain operations or processes, or simply because the message can sometimes be annoying and constantly appears when you install or run a program on Windows.
Learn how to disable UAC safely and effectively, understanding the impact of this action and considering alternatives to keep your system secure.
What is User Account Control (UAC)?
User Account Control (UAC) is a security feature introduced by Microsoft in Windows Vista and present in later versions of the operating system. Its primary function is to ensure that applications and system changes are authorized by the user before they are applied, helping to prevent unwanted and potentially harmful changes.

When an application or process attempts to make a change that requires administrative permissions, UAC displays a confirmation window. This can include software installations, system setting changes, and important updates.
Why Disable UAC?
Although UAC is a valuable tool for protecting your system, there are situations where disabling it might be desirable, such as:
- Development Environments: In development environments, especially when working with multiple applications that frequently require administrative permissions, UAC can become an obstacle. Disabling UAC can make the process more streamlined.
- Process Automation: For users who set up scripts or applications that need constant administrative permissions, disabling UAC can simplify automation.
- Performance: In some cases, UAC may cause slowdowns by repeatedly asking for permissions during operations that require elevated privileges.
How to Disable UAC (User Account Control)
Here is a step-by-step guide to disable UAC in Windows:
- Click the Start button and type “Control Panel” in the search bar.
- Select Control Panel from the search results.
- In the Control Panel, click on User Accounts.
- Then, select Change User Account Control settings.
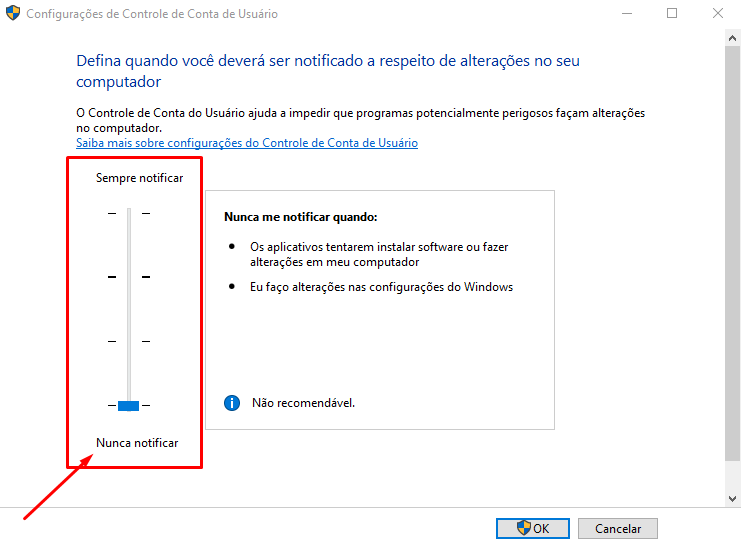
- In the User Account Control Settings window, you will see a slider that allows you to adjust the level of UAC notifications.
- To completely disable UAC, move the slider down to Never notify.
- Click OK to apply the changes.

Disabling User Account Control (UAC) can be a practical solution in certain scenarios, such as in development environments or to simplify the execution and installation of programs on Windows.


![%Canal do Shin imagens% 6 Como Deixar a Barra de Tarefas do Windows Transparente [TranslucentTB]](https://canaldoshin.com.br/wp-content/uploads/2024/09/Como-Deixar-a-Barra-de-Tarefas-do-Windows-Transparente-TranslucentTB-390x220.png)
